|
<< Click to Display Table of Contents >> Incremental Part Override Tool |
  
|
|
<< Click to Display Table of Contents >> Incremental Part Override Tool |
|
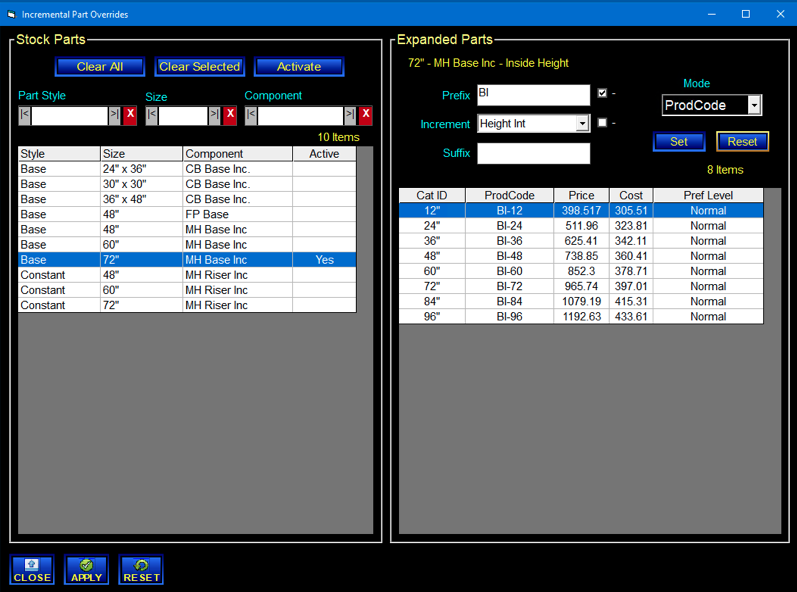
![]()
The Incremental Part Override tool is used to set nonlinear sequences for Product Code, Price, and Cost for incremental parts.
It also allows you to set the Preference Level for individual incremental parts.
Open the Tools palette in the Stock screen and click the "Incr Ovrd" button to open this tool. |
Main Buttons
|
Clear All removes overrides from all parts shown in the Stock Parts panel. |
|
Clear Selected removes overrides from the specific part selected in the Stock Parts panel.
|
|
Activate creates a table to hold the override values for a part.
When a part is first activated, the price, cost, and product codes in the table are set to the same values as before the override was activated. Now you can make changes to these values in the Expanded Parts panel.
The Active column shows which parts have overrides. |
|
The Set button at the top of the Expanded Parts panel applies the choices made in the panel to the parts selected in the lower grid of the panel. |
|
The Reset button at the top of the Expanded Parts panel discards any pending changes to the part selected in the panel. This action only discards changes to that part since the last Apply operation. |
|
Apply saves all changes that have been made in the Incremental Part Override tool.
This is the equivalent of the Replace button on the Stock screen, except that it can update multiple parts at one time. |
|
The Reset button at the bottom of the Incremental Part Override tool discards any changes made to any part since the last Apply operation.
This is an easy way to discard changes to multiple parts without having to reset them individually.
|
|
Close at the bottom of the Incremental Parts Override tool closes the tool and returns to the Stock screen. If changes have been made that are not yet applied, a message will be displayed to allow the changes to be saved or discarded. |
Stock Parts Panel
The Stock Parts panel lists all the incremental parts in your Stock file. Use the filters at the top of the Stock Parts panel as needed to reduce the list to the desired parts.
This is also where you can Activate and Clear any overrides.
Expanded Parts Panel
The Expanded Parts panel shows details about the part selected in the Stock Parts panel, including individual part heights and associated product code, price, and cost.
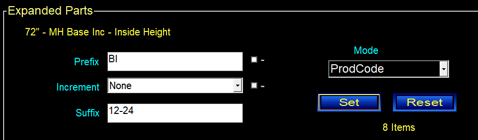
The Mode selector determines what settings we are going to override. The choices are Product Code, Price, Cost, and Preference Level, and are detailed in the table below.
|
Product Code Override
There are five elements for creating product codes. All these elements can be used or omitted as needed to create your customized product codes.
Set a Product Code To override the product code for parts, take these steps:
To apply the same override to the remaining parts in the grid, select those parts and click the Set button again.
Keep in mind that you do not need to use all elements available. You can use one or more of the elements listed in steps 1-6 as desired to construct your product code. |
||||||||||||||||||||||||||||||||||||||||||
|
Price Override
Note: These steps also apply to Cost Overrides. To do this, choose Cost rather than Price in the Mode selector.
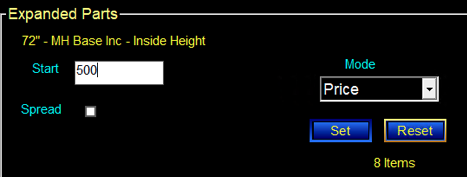
Set a Single Price To override the price of one or more parts, take these steps:
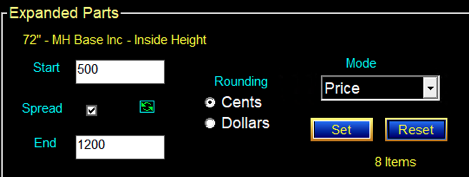
Set a Range of Prices To set a range of prices evenly spread across multiple parts, take these steps:
The first selected part will be set to the start price. The last selected part will be set to the end price. The parts in between will have prices evenly spread from the start price to the end price.
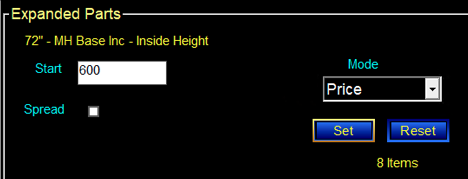
Set Stair-Step Pricing and Product Codes To create stair-step pricing, where a group of parts have the same price, take these steps:
To set a single Product Code for each product code group, take these steps:
Keep in mind that you do not need to use all elements available. You can use one or more of the elements listed as desired to construct your prices and product codes. |
||||||||||||||||||||||||||||||||||||||||||
|
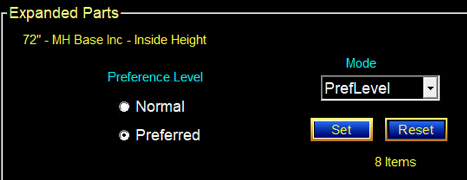
Preference Level Override
If you have certain parts that you would like to use more often than other parts, such as a standard part that you always have on hand, you can set your preference to reflect that.
The Preference Level (PrefLevel) instructs Stack-It to use specific parts that you prefer, whenever possible.
To set Preference Levels, take these steps:
|
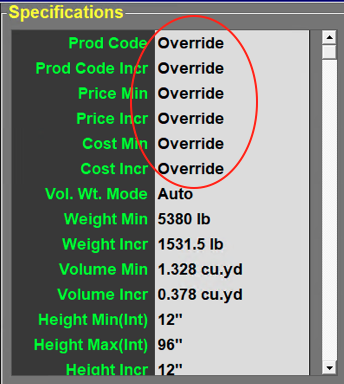
Stock Screen
On the Stock screen, the Specifications panel lets you know when an override exists for a particular part.