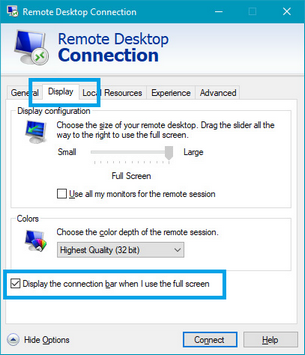
Step 4
|
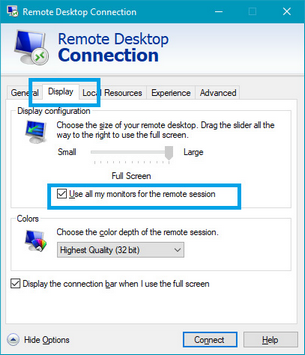
| • | Check "Display the connection bar ...". |
|
|
Step 5
|
OPTIONAL
| • | If you want to use multiple monitors, check the "User all my monitors" check box. |
|
|
Step 6
|
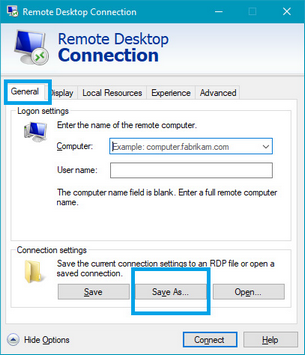
| • | Click the Save As... button. |
|
Note:
|
| • | For use with the Stack-It Cloud Starter program: |
| o | Name the file "Stack-It Cloud" |
| o | Save the file in folder "C:\Stack-It Cloud" |
| o | Save the file on the Desktop. |
| • | For security, DO NOT save an icon on public or temporary computers. |
|
|