Cloud Starter Installation

|
|
|
|
Step 2
|
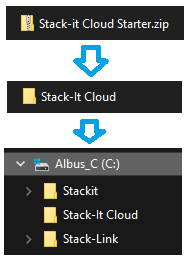
| • | Copy the "Stack-It Cloud" folder to the "C:\" drive. |
|
|
Step 3
|
| • | Open the "C:\Stack-It Cloud" folder |
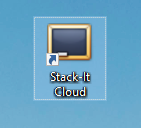
| • | Copy the shortcut to the desktop. |
|
|
Step 4
|
OPTIONAL:
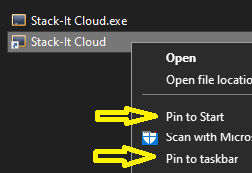
| • | Right click the shortcut icon. |
| • | "Pin to Start" or "Pin to taskbar". |
|
|
Step 5a
|
If you DO have an RDP file for the cloud:
| • | Move it to the "c:\Stack-It Cloud" folder. |
|

|
Step 5b
|
If you DO NOT have an RDP file for the cloud:
|
|
Step 6
|
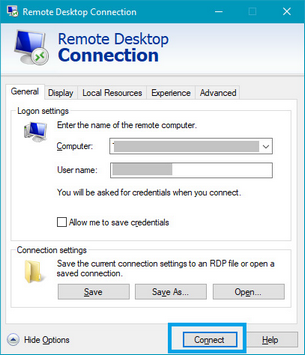
| • | Open the RDP file (from Step 5). |
| • | Click Connect to begin the login process. |
|
|
Step 7
|
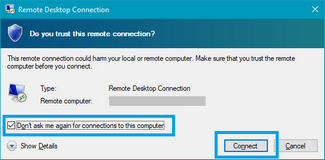
| • | Check the box "Don't ask me ...". |
| • | Click Connect to finish the process. |
| • | You will be logged into the cloud. |
| • | Log off the cloud (before Step 8). |
|
Note:
|
If you have already done this step (while creating your RDP file), this panel will not be displayed and you will be logged in to the cloud.
In this case:
|
|
Step 8
|
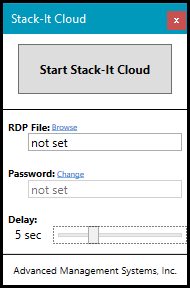
| • | Open the Stack-It Cloud program |
| • | Click the "Browse" link. |
| • | Select the RDP file (from Step 5). |
| • | Click the "Change" link. |
| • | Enter the user's cloud password. |
| • | Click the Start Stack-It Cloud button. |
|
Uh Oh..
|
If the connection screen is not displayed,
check the following:
| • | Open the RDP file directly and confirm it contains the computer name and user name. |
| • | Confirm the RDP file has been selected (Step 6) |
| • | Confirm that password has been entered (Step 6) |
|
|
|
|
|
You are now ready to use the Cloud Starter program. Simply start the icon on the desktop and click the Start Stack-It Cloud button and you will be connected with your Stack-It Cloud session.


